A Beginner’s Guide to Raspberry Pi
The Raspberry Pi foundation is a UK charity created as an attempt to teach young people how to programme, in an era where computers are used in more forms than ever before. Back in the 1980s, it was common for kids to learn how to code in order to create games and other programmes on their BBC computers, giving them a knowledge of computers that stuck with them into adult life.
It’s this intrinsic knowledge that Raspberry Pi aims to teach kids, opening up a whole range of opportunities for programming, electronics and more. For example, one eleven year old Raspberry Pi owner managed to create a 3D printer that could be powered by her iPad, so that she could print herself an army of minions!
In February 2015 the Raspberry Pi foundation launched the flagship Raspberry Pi 2 a mini computer.
What is a Raspberry Pi
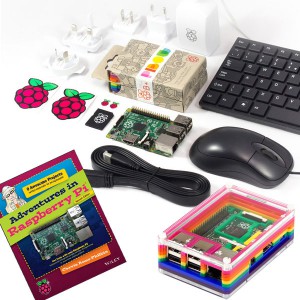
A Raspberry Pi is a credit card sized computer, which runs off Linux from an SD card. Any card of 4GB or more will work, although you can purchase one that is pre-loaded with an operating system. If you choose not to purchase this special SD card, you can download an operating system yourself and install it on a regular card.
The Rasberry Pi features a number of simple components, including:
- USB ports for a keyboard and mouse (and anything else)
- Ports to plug in a TV or desktop screen (HDMI or analogue)
- A micro USB port for the power supply
- A slot for the SD card
- An Ethernet network port to connect to the internet
- GPIOs (General purpose input/output pins)
- Video & Audio ports
- CSI camera port
Why is a Raspberry Pi special?
The Raspberry Pi is a cheap, portable, and durable little computer, and it connects to real world objects. It can be used in the classroom or at home, for an unlimited number of projects. There are so many uses for Raspberry Pi that its success is hardly surprising; since the company launched around three years ago, more than 5 million have been sold around the world.
Setting Up
To set up your Raspberry Pi, all you need is your SD card, a micro USB charger, a computer mouse and a monitor. You may also want to use an Ethernet cable to connect to the internet, and some headphones.
Once your SD Card is inserted, plug in your mouse and monitor, and your Ethernet cable if you wish, but the Raspberry Pi does have 4 USB ports which means you can add a USB Wifi dongle and connect wirelessly to the internet. Finally, plug in your power supply and switch it on to boot your Raspberry Pi.
Now that the boot process has completed, you will be prompted to type in a login. The default login for the Raspian operating system is:
Username: Pi
Password: Raspberry
After you have logged in, simply type “startx” and press Enter on your keyboard to launch the user interface. Your Raspberry Pi is now ready to use as a computer!
What is a Raspberry Pi used for?
Raspberry Pi is an effective way to teach programming skills to children as part of ICT at school. But they are not limited for use in ICT; they could also be used for science and even music lessons.
Outside of school, children can use the Raspberry Pi to create exciting applications and games. For example, they could add a webcam to the Pi and create a security system for their bedroom. They can also take Minecraft to a new level, by creating programs that interact with the game. How cool and motivational is that!
Hobbyists of all ages have taken a shine to the Raspberry Pi because it is the perfect machine for electronics projects, particularly robotics. It has meant that even though the computer was created primarily for children, it is not limited to young minds!
For more information about the Raspberry Pi for kids, please get in touch with us here at BrightMinds. We’d be happy to answer your questions!
Finally, here are some great sites if you want to read and learn more:
- The Raspberry Pi Foundation
- A great poster high-lighting all the important parts of Raspberry Pi 2
- Geek Gurl Diaries– A fabulous site full of ICT project ideas!
- Great project Ideas for kids


